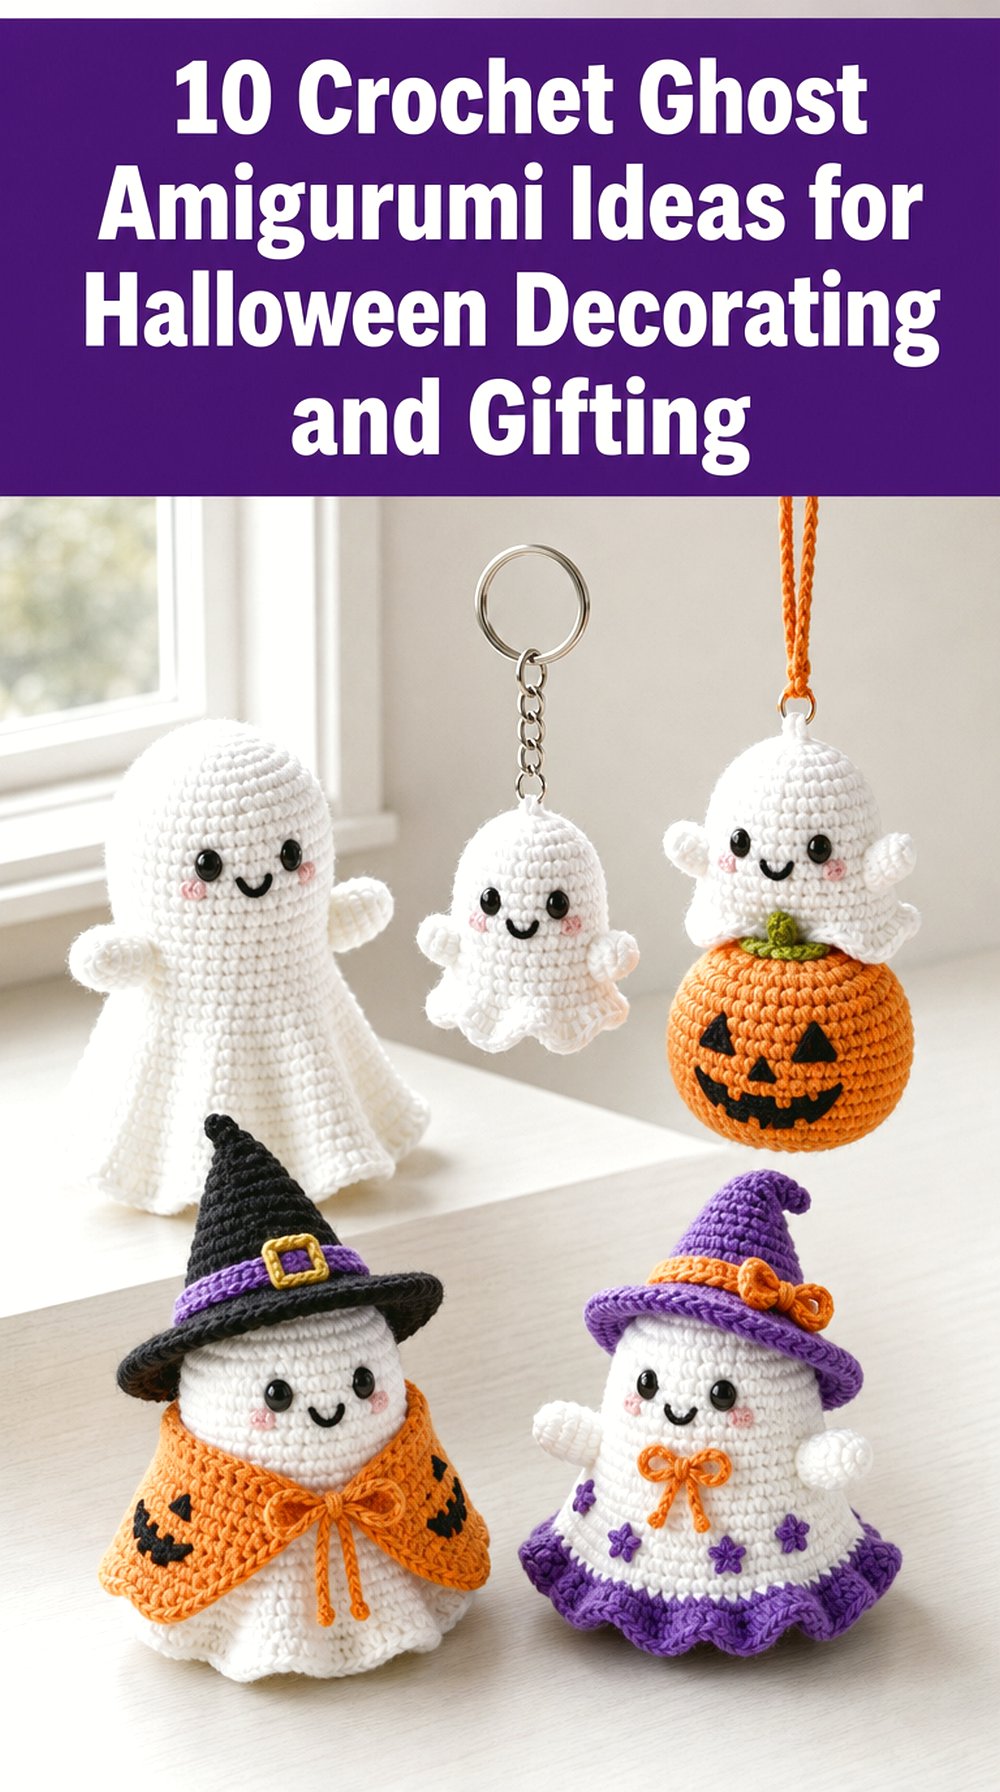

Crochet ghost amigurumi can be tiny enough for a keychain, soft enough for shelf decor, or detailed enough to become a full Halloween display piece. This collection keeps the focus on finished ghost shapes that differ in size, styling, and use, so readers are not choosing between ten versions of the same plain white figure.
Some ideas are compact and simple-looking, while others include hats, pumpkins, buttons, hanging cords, or a more shaped “sheet” body. Use the project notes to compare display style, finishing details, and what to confirm in each original tutorial before picking the ghost that fits your Halloween plans.
Quick List
- Crochet Standing Sheet Ghost Amigurumi
- Crochet Mini Ghost Keychain Amigurumi
- Crochet Ghost and Pumpkin Hanging Charm
- Crochet Two-Size Rounded Ghost Plush
- Crochet Arm-Optional No-Sew Ghost
- Crochet Mini Ghost with Halloween Hat
- Crochet Witch Ghost with Pumpkin Shawl
- Crochet Pointed Witch Hat Ghost
- Crochet Button-Front Ghost with Arms
- Crochet Colorful Halloween Ghost Amigurumi
Why These Crochet Ghost Amigurumi Projects Are Worth Making
Ghost amigurumi works well for Halloween because the basic character is easy to recognize, but the finished style can change a lot. A small keychain has a different purpose from a soft shelf ghost, and a hanging charm needs different planning than a standing plush. That makes this category useful for decorating small spaces, building a handmade Halloween tray, adding seasonal bag accessories, or making gifts that do not need to match one exact color scheme.
The details also matter. Hats, pumpkin accents, arms, face embroidery, buttons, and shaped bottoms can make each ghost feel separate in a group display. Before starting, readers should check each creator’s materials, finished size information, and any assembly notes in the original source.
1 . Crochet Standing Sheet Ghost Amigurumi
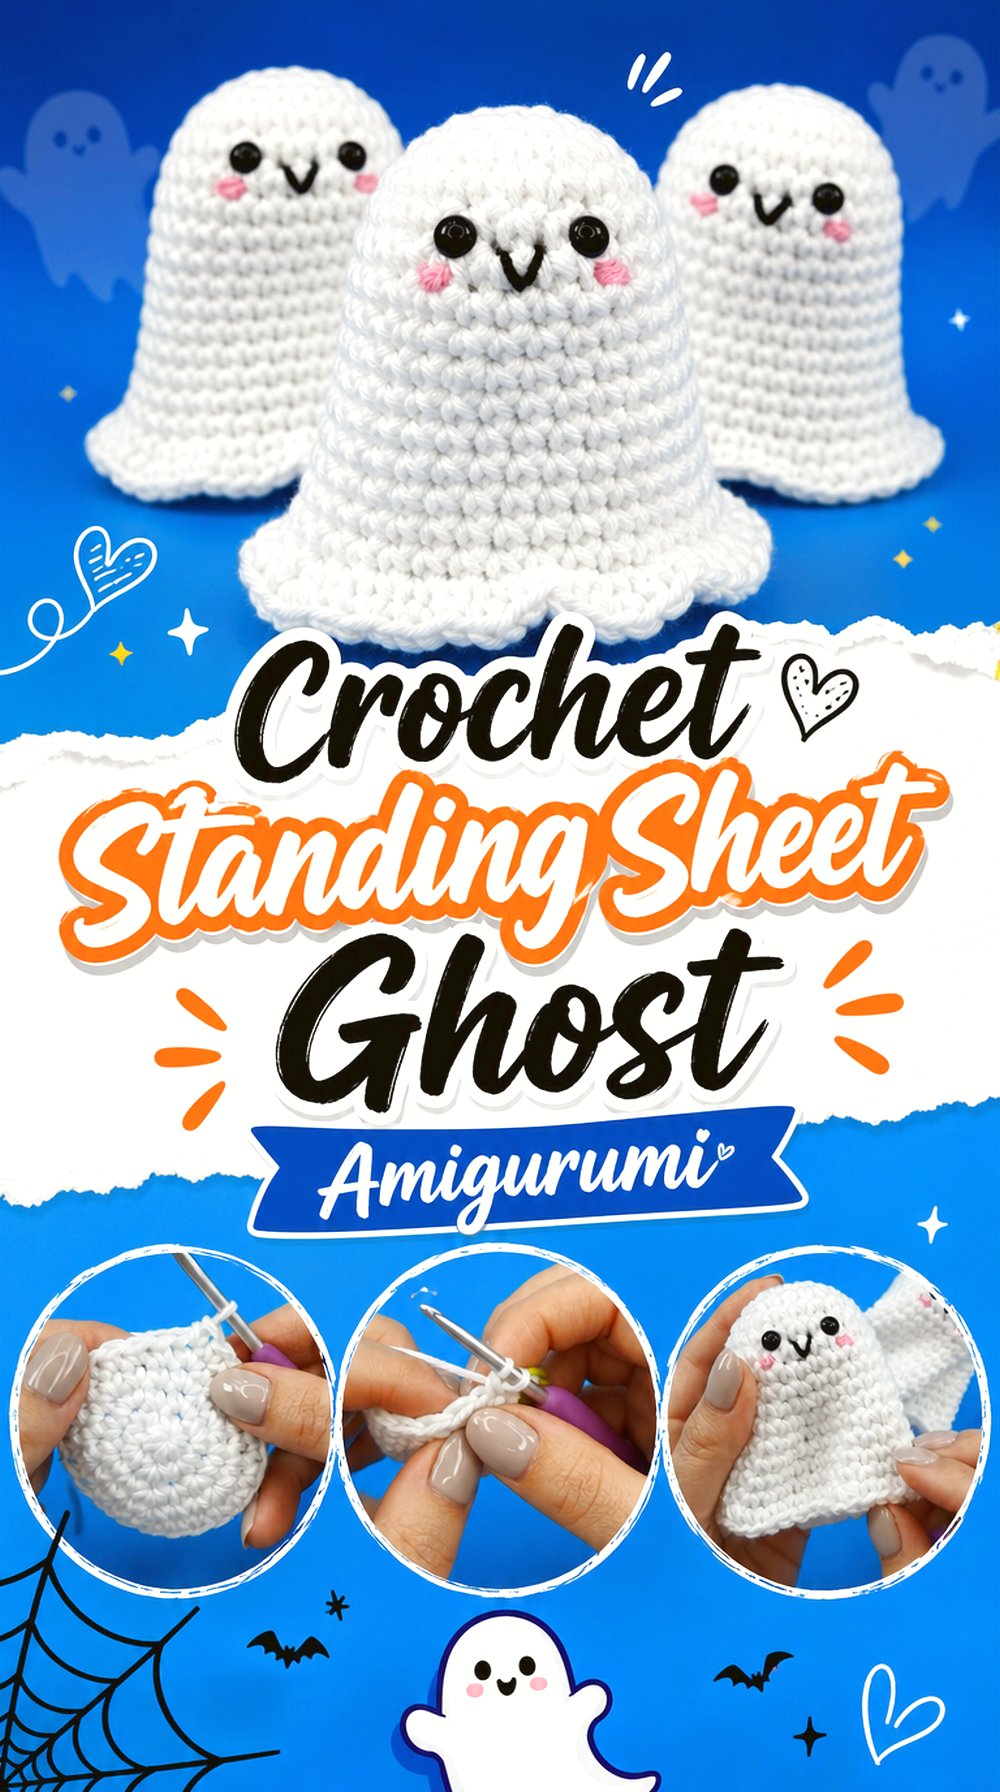
The standing sheet shape makes this ghost feel more like a classic little Halloween figure than a round plush ball. Its wider lower edge helps define the “floating sheet” look, while the face and shaped body keep it friendly enough for seasonal shelves, garlands, or small decor groups. This option stands apart from the keychain and hanger ideas because the finished piece is meant to hold its own shape as a display ghost rather than hang from hardware.
Check the Standing Shape
A standing ghost needs a base that sits neatly and does not collapse into a soft mound. Before choosing this project for shelf decor, look at how the lower edge is shaped in the finished result and compare it with where you plan to place it. A flat tray, mantel, or desk corner will show the sheet shape more clearly than a crowded basket.
Think About Display Grouping
This ghost can work alone, but the simple sheet form also makes it useful in a group with pumpkins, bats, or smaller ghosts. Keep the surrounding items lower or smaller so the body outline remains visible. When making more than one, changing only the face or yarn color may be enough to create variety without losing the matching ghost family look.
Review the Full Guide First
The tutorial includes a shaped ghost body and facial finishing, so it is worth watching the full guide before starting. Pay attention to the point where the sheet section changes into the head area, because that transition affects the finished silhouette. Use the creator’s exact construction details rather than trying to recreate the shape from the photo alone.
Original Tutorial and Creator Credit
Creator: Hooked by Robin
2 . Crochet Mini Ghost Keychain Amigurumi
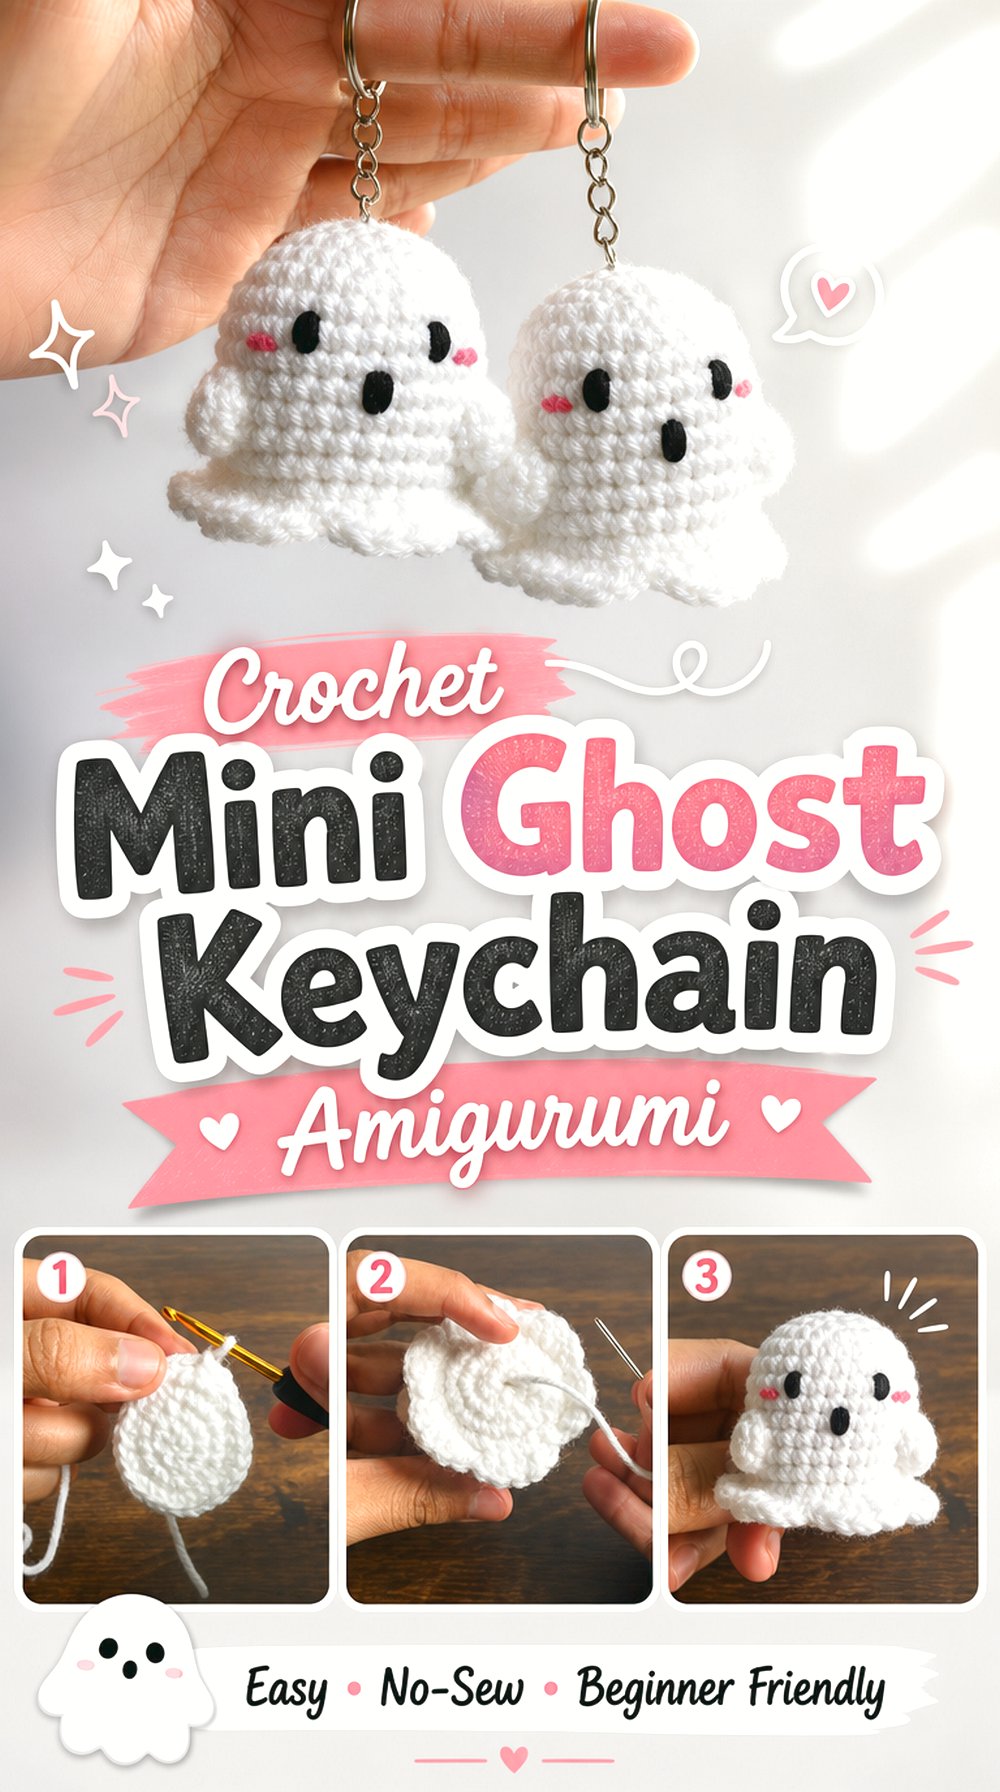
A small ghost keychain turns the amigurumi idea into something portable and easy to attach to a bag, pouch, or seasonal gift tag. The compact body, simple face, and keyring finish make it different from larger shelf ghosts because the top attachment becomes part of the final use. This is a good option for readers who want a Halloween piece that can travel, but the hardware and finished size should be checked before treating it as an everyday accessory.
Check the Keyring Attachment
The keyring changes how the finished ghost will be handled. Look closely at where the hardware is added and whether the top of the ghost looks centered once it hangs. A charm that tilts too far forward may still be cute, but readers planning to use it on a bag should confirm the attachment point before finishing the face and details.
Consider Small-Item Wear
A keychain ghost may be bumped, squeezed, or pulled more than a shelf decoration. That does not mean it cannot be used, but it does mean the face details and ring attachment deserve extra attention. Readers should follow the creator’s finishing method closely and decide whether the finished piece is better for light decoration, gifting, or regular daily use.
Confirm the Material List
Before buying supplies, check the creator’s material section for the yarn, hook, stuffing, eye or embroidery details, and keychain hardware used in the tutorial. Small changes can affect the final size and how the piece hangs. If substituting materials, compare the finished look carefully so the ghost still feels balanced beside the metal ring.
Original Tutorial and Creator Credit
Creator: Divine Crochets
3 . Crochet Ghost and Pumpkin Hanging Charm
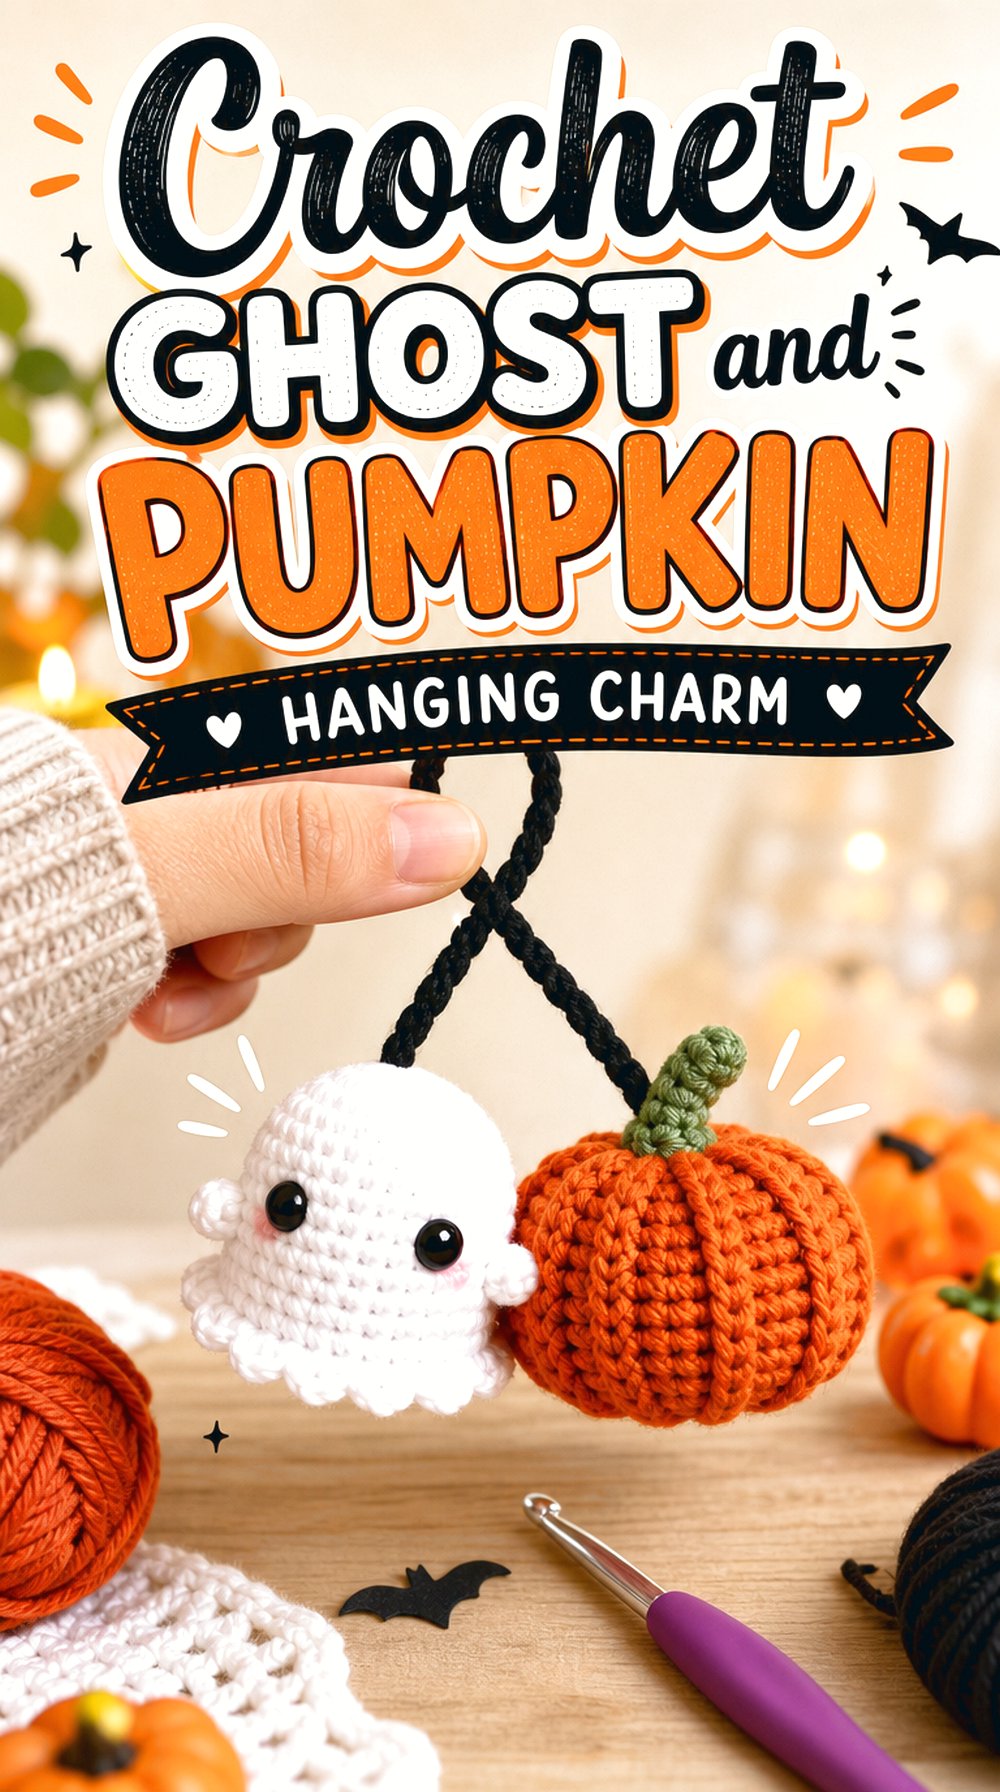
This hanging charm combines a ghost with a pumpkin, so the finished piece reads more like a complete Halloween ornament than a single amigurumi figure. The hanger format can work for a car mirror, desk hook, wall peg, or bag display when used carefully. It differs from a keychain because the pumpkin, ghost, and hanging cord all need to sit in balance, making placement and spacing just as important as the individual shapes.
Plan the Hanging Position
A hanging charm needs enough open space around it so the ghost and pumpkin do not twist into nearby items. Before starting, decide whether it will hang from a mirror, hook, shelf peg, or bag strap. That choice affects how visible the ghost face will be and whether the pumpkin sits as a clear second feature instead of getting hidden behind the body.
Check the Separate Pieces
This project includes more than one finished element, so readers should watch for how the ghost, pumpkin, and hanger are brought together. Do not rely only on the final photo when planning. The spacing between pieces matters, especially if the charm will move, swing, or be viewed from both sides in its final spot.
Review the Final Assembly View
The most useful part to review is the final assembly, because it shows how the charm becomes one hanging item. Pause before attaching the pieces and compare the direction of the faces, the cord length, and the pumpkin placement. A small adjustment at that stage can make the finished charm easier to display neatly.
Original Tutorial and Creator Credit
Creator: littlekaycrochet
4 . Crochet Two-Size Rounded Ghost Plush
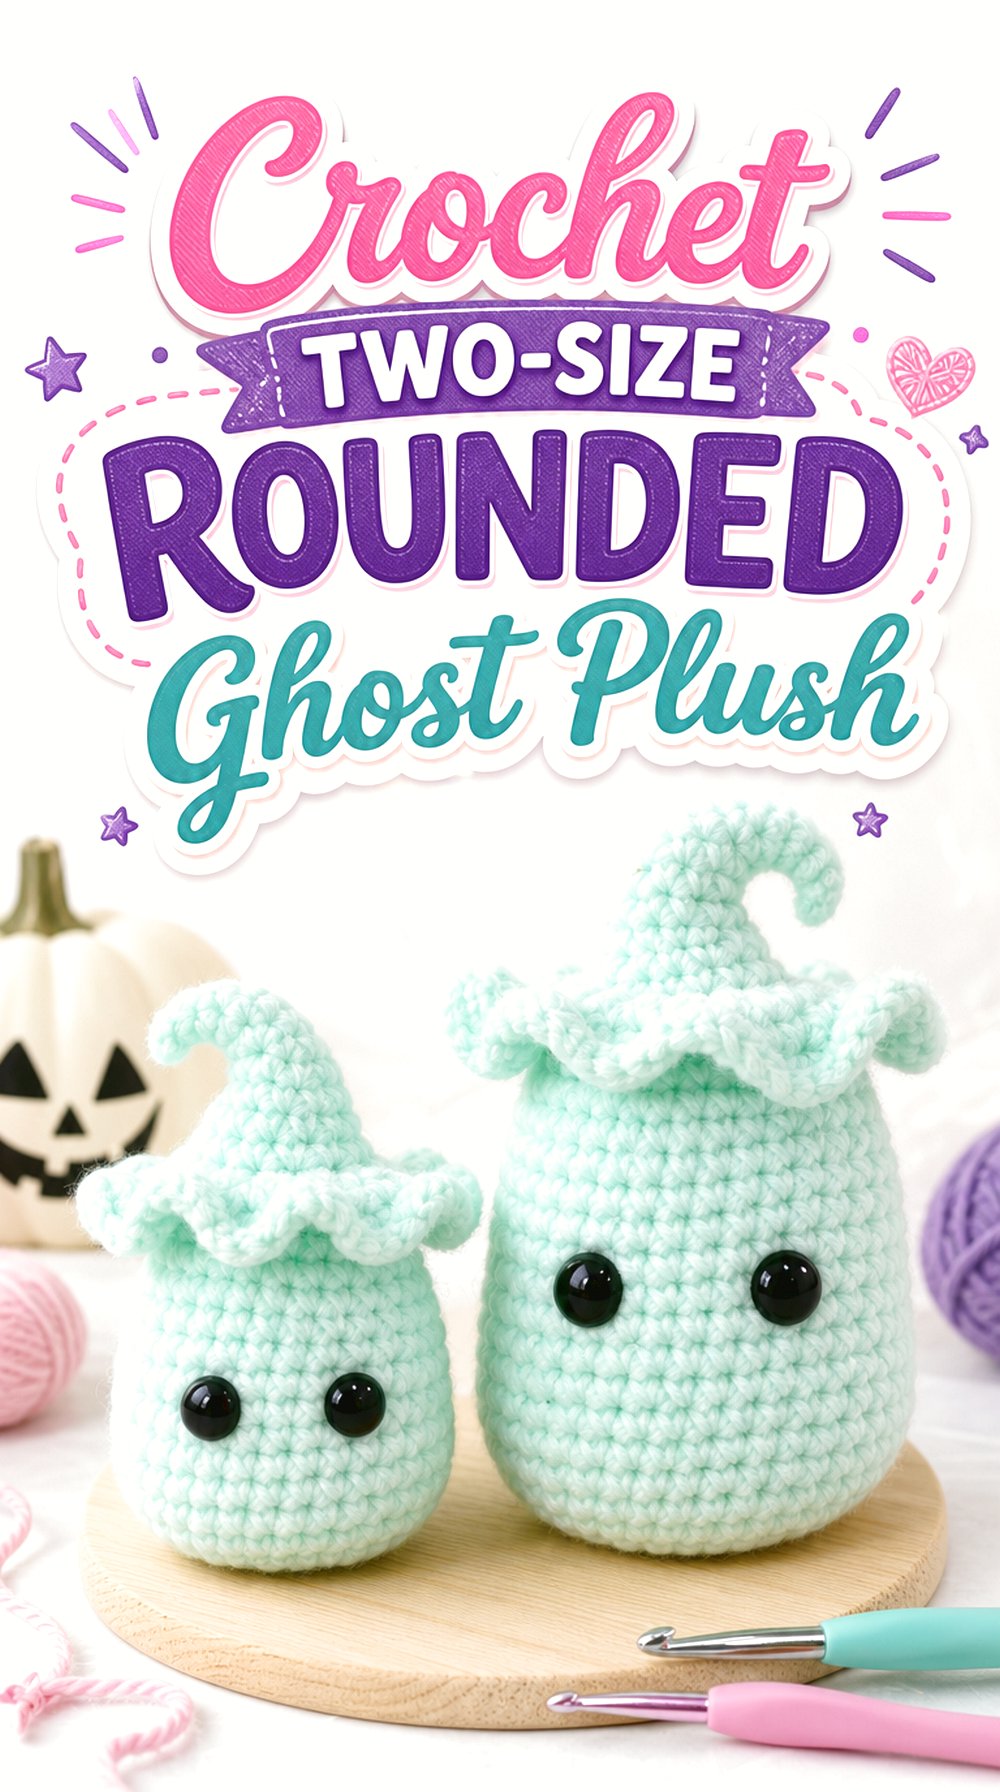
This rounded ghost plush is useful for readers who want the same general ghost design in different finished scales. The tutorial notes options for a smaller version and a larger plush-style version, which makes it different from the mini-only and keychain projects. The smooth body and soft rounded look can suit a Halloween shelf, basket, or plush display, but readers should choose size based on where the ghost will sit and how much space it may need.
Compare the Size Options
The main decision is whether a mini ghost or a larger plush ghost fits the planned use better. A small ghost can tuck into a tiered tray or desk corner, while a larger version needs more display room and may become the main item in a Halloween arrangement. Check the creator’s size guidance before choosing yarn or changing materials.
Think About Shape Retention
A rounded plush ghost depends on even stuffing and a clean lower shape to keep the character recognizable. If the ghost is meant to sit on a shelf, look for a firm enough finish that the base does not roll or lean. Readers should follow the original shaping and finishing details instead of assuming every yarn weight will behave the same way.
Plan Before Buying Supplies
Because this source discusses more than one size direction, supply planning matters. The yarn weight, hook, stuffing, and eyes may vary depending on the version selected. Before purchasing, choose the size first, then record the creator’s suggested materials for that version so the finished ghost does not turn out unexpectedly large or small.
Original Tutorial and Creator Credit
Creator: The Loopy Lamb
5 . Crochet Arm-Optional No-Sew Ghost
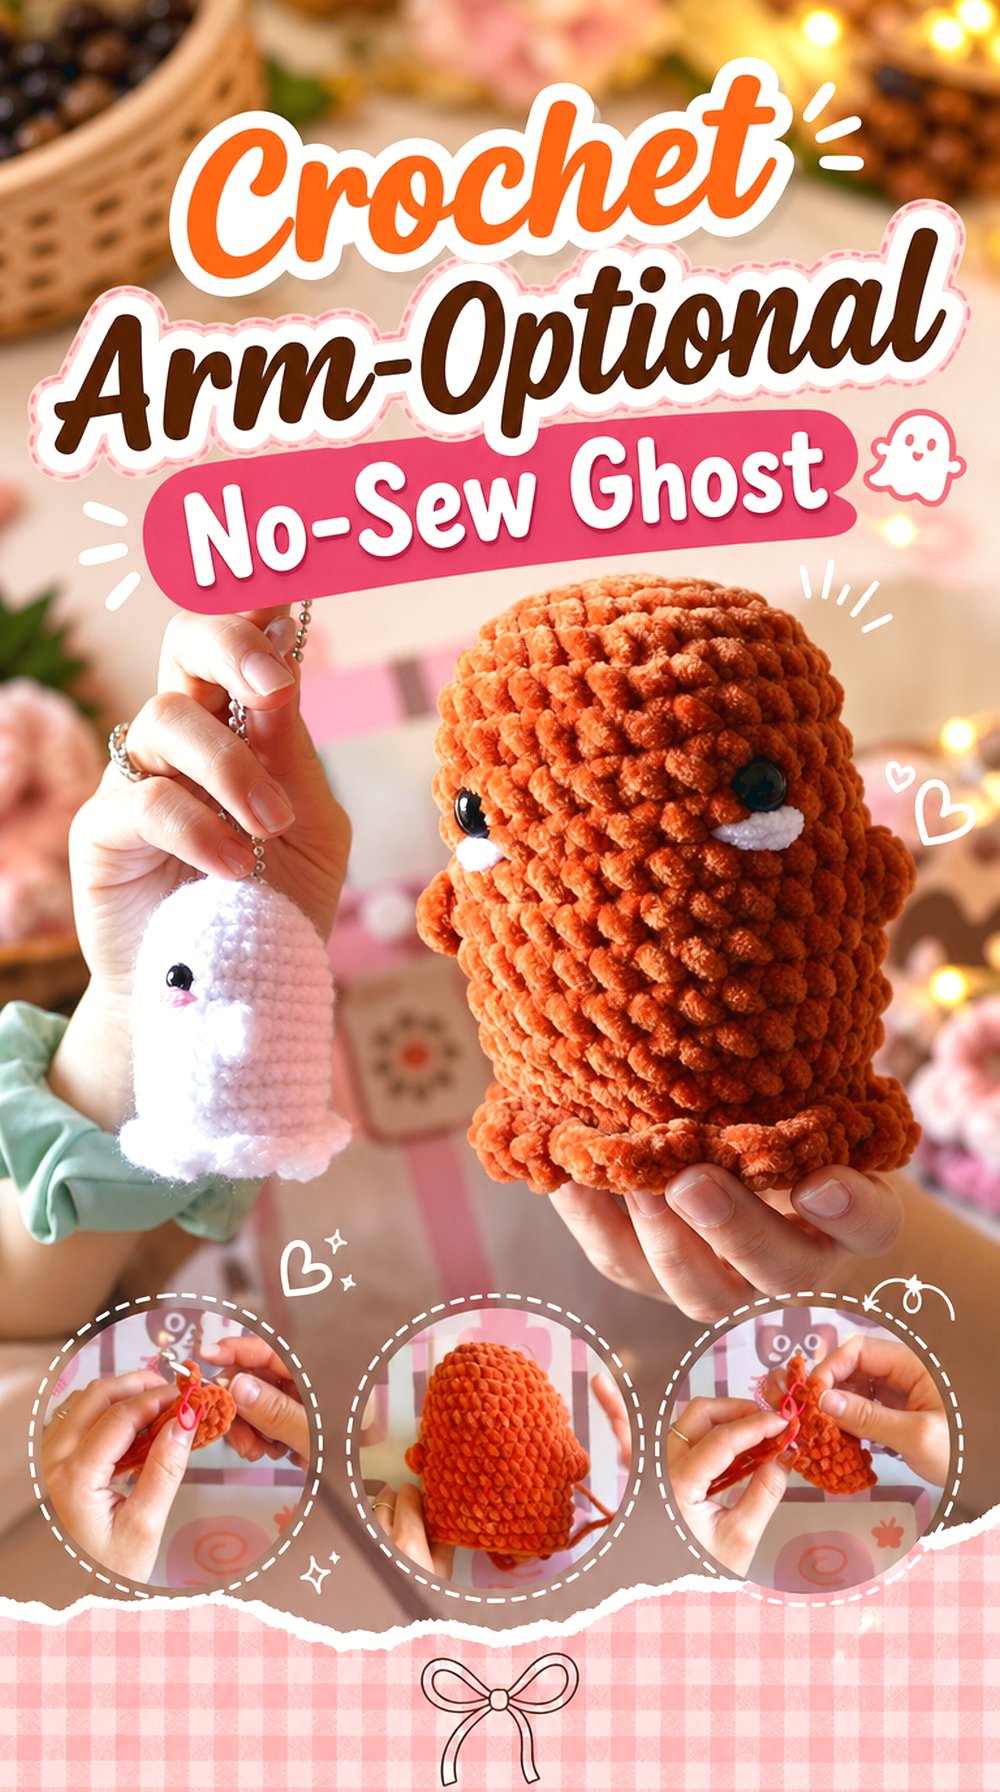
This plush ghost has a soft rounded body with optional styling choices, including arm and keychain variations noted by the creator. That makes it a flexible pick for readers who like one base ghost shape but want to decide how much detail to add. It differs from the hanging charm because the ghost can remain a standalone plush, while still giving room for a smaller accessory-style finish if the reader follows the creator’s option.
Decide on the Arm Detail
The arm choice changes the personality of the finished ghost. With arms, the figure looks more animated and toy-like; without them, it feels cleaner and simpler. Before moving too far into the project, decide which version matches the intended use. A shelf group may benefit from arms, while a cleaner shape may suit a tighter display.
Check the Keychain Option
The creator includes a keychain direction, but readers should decide whether that suits their materials and final size. A plush-style ghost can become bulky if the yarn is thick, so it may work better as decor than as a daily charm. Check the original placement and finishing notes before adding hardware to the top.
Note the Finished Measurements
This source gives a finished measurement for the version made with the listed yarn and hook. Readers who need a ghost for a specific shelf, market display, or gift box should compare that information before beginning. Changing yarn or hook size can change the final dimensions, so the original measurement should be used as a reference, not a guarantee.
Original Tutorial and Creator Credit
Creator: CrochetByGenna
6 . Crochet Mini Ghost with Halloween Hat
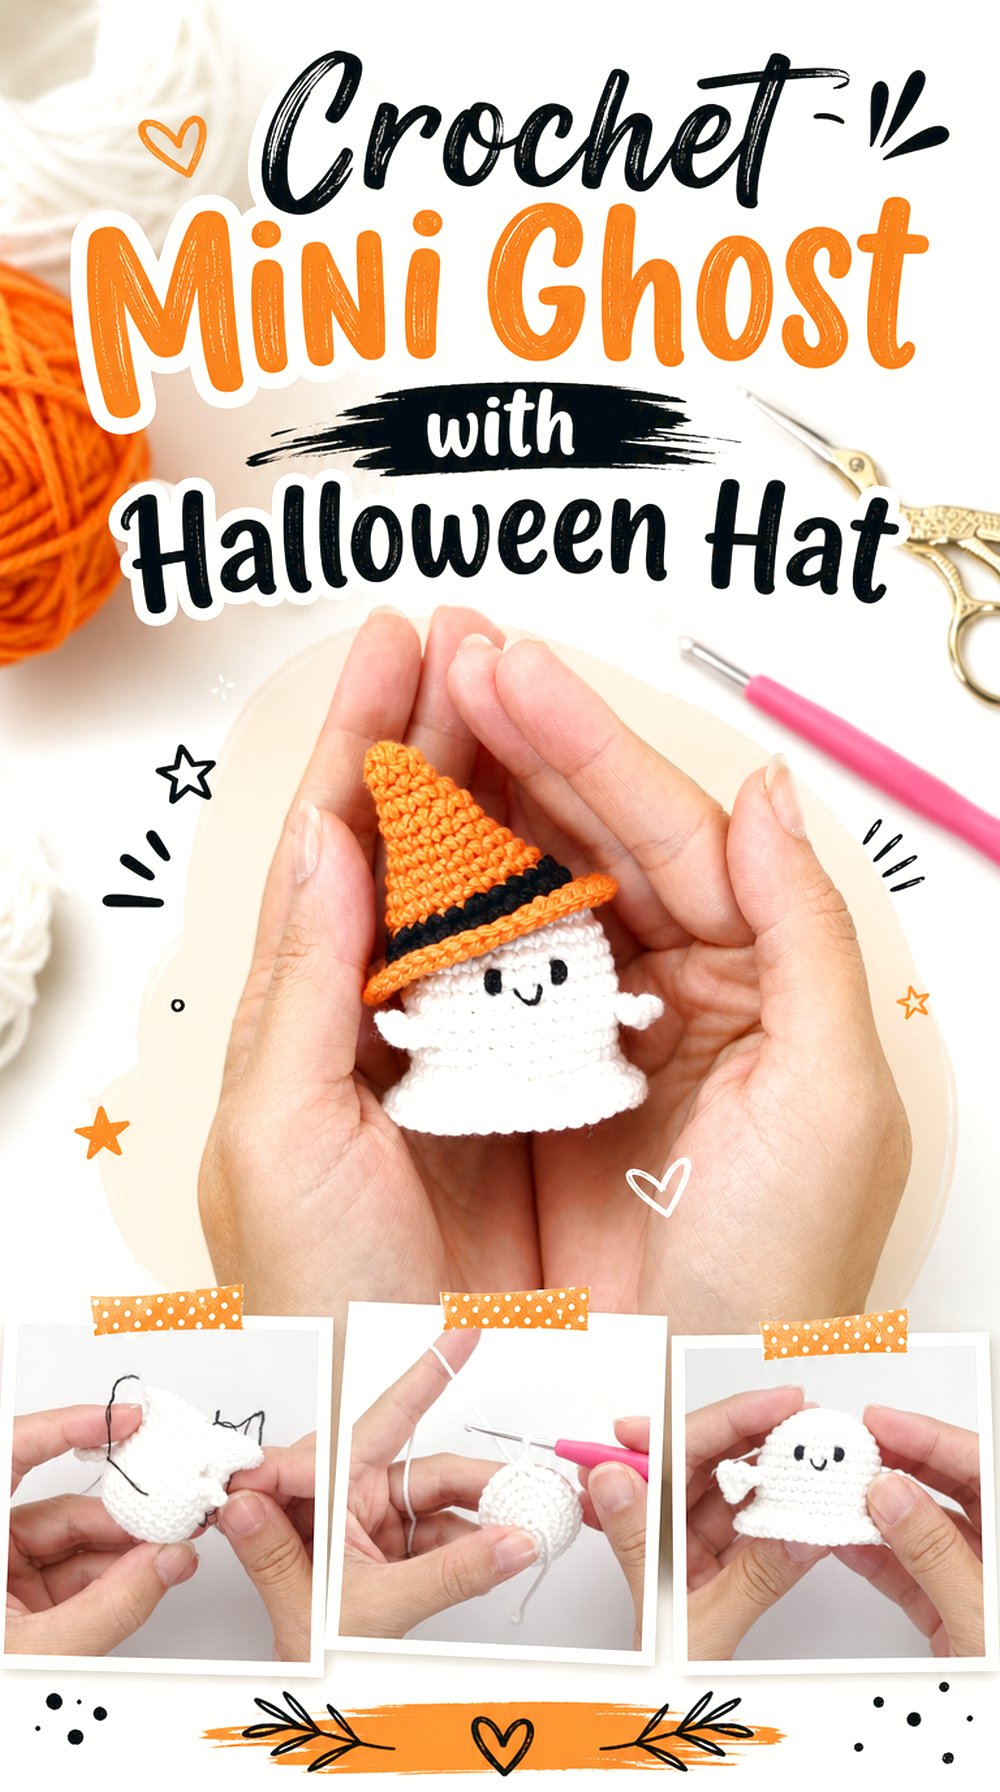
This mini ghost includes a small hat, giving the finished amigurumi more character than a plain white figure while still staying compact. The hat adds a bright Halloween detail and helps the little ghost stand out in a tray, basket, or small seasonal scene. It differs from the larger witch-hat projects because the scale is still miniature, so the charm comes from small proportions and tidy finishing rather than dramatic accessories.
Keep the Hat in Proportion
On a mini ghost, the hat should look like a character detail rather than a heavy top piece. Check how the hat sits on the head and whether it covers the face or changes the balance. If using different yarn from the tutorial, compare the hat size against the body before fastening it permanently.
Confirm the Finished Size
The creator provides finished size information for the listed materials, which is helpful for planning displays or gifts. Readers making a Halloween tray, ornament group, or small package topper should check that measurement before starting. Any yarn substitution can shift the finished height, so the listed size works best as a planning reference.
Watch the Face Placement
A tiny ghost depends on clear face placement because there is less surface area for expression. Look at where the eyes and mouth sit in relation to the hat and lower body. The face should remain visible after the hat is added, especially if the ghost will be displayed among other small Halloween amigurumi pieces.
Original Tutorial and Creator Credit
Creator: Little Crochet Farm
7 . Crochet Witch Ghost with Pumpkin Shawl
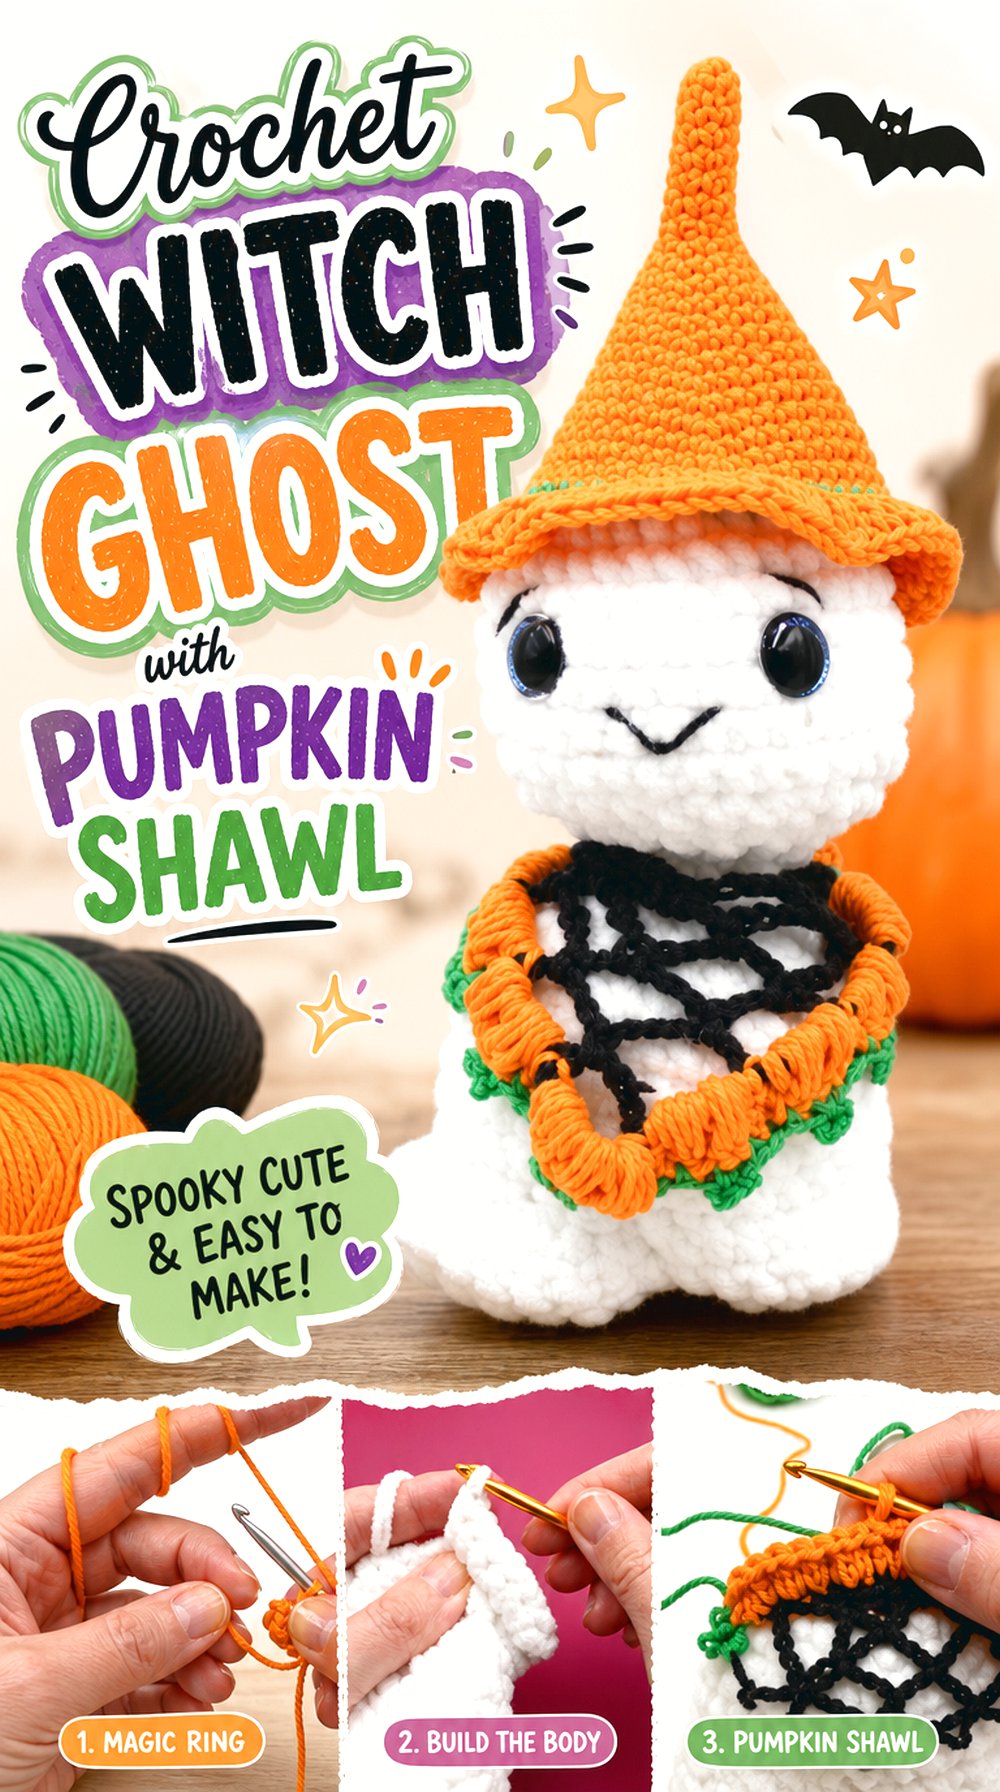
This ghost is the most dressed-up option in the collection, with a witch hat and pumpkin shawl giving it a full seasonal character. The extra accessories make it better suited to a feature spot on a shelf or table than to a tiny charm. It differs from the simpler witch-hat ghost because the shawl adds texture, color, and a layered look that needs more planning before the final assembly.
Plan for a Feature Display
A ghost with a hat and pumpkin shawl needs more visual space than a plain mini ghost. Place it where the front detail can be seen clearly, such as the center of a Halloween shelf, a mantel arrangement, or a small display stand. Crowding it beside taller items may hide the shawl and reduce the effect of the costume details.
Check the Accessory Pieces
The shawl and hat are key parts of this design, not afterthoughts. Review the creator’s material list and accessory sections before starting so the colors and yarn choices are ready. Because the project includes extra components, readers should be comfortable managing separate details and finishing work before committing to this more involved ghost.
Consider the Head Support Note
The tutorial mentions an optional head stabilizer, which is worth reviewing if the finished ghost needs to stand neatly with the hat and shawl in place. Added accessories can affect balance and posture. Readers should check the source carefully before deciding whether their version needs that support or can rely on stuffing and shaping alone.
Original Tutorial and Creator Credit
Creator: Crochet with Yarnhild
8 . Crochet Pointed Witch Hat Ghost
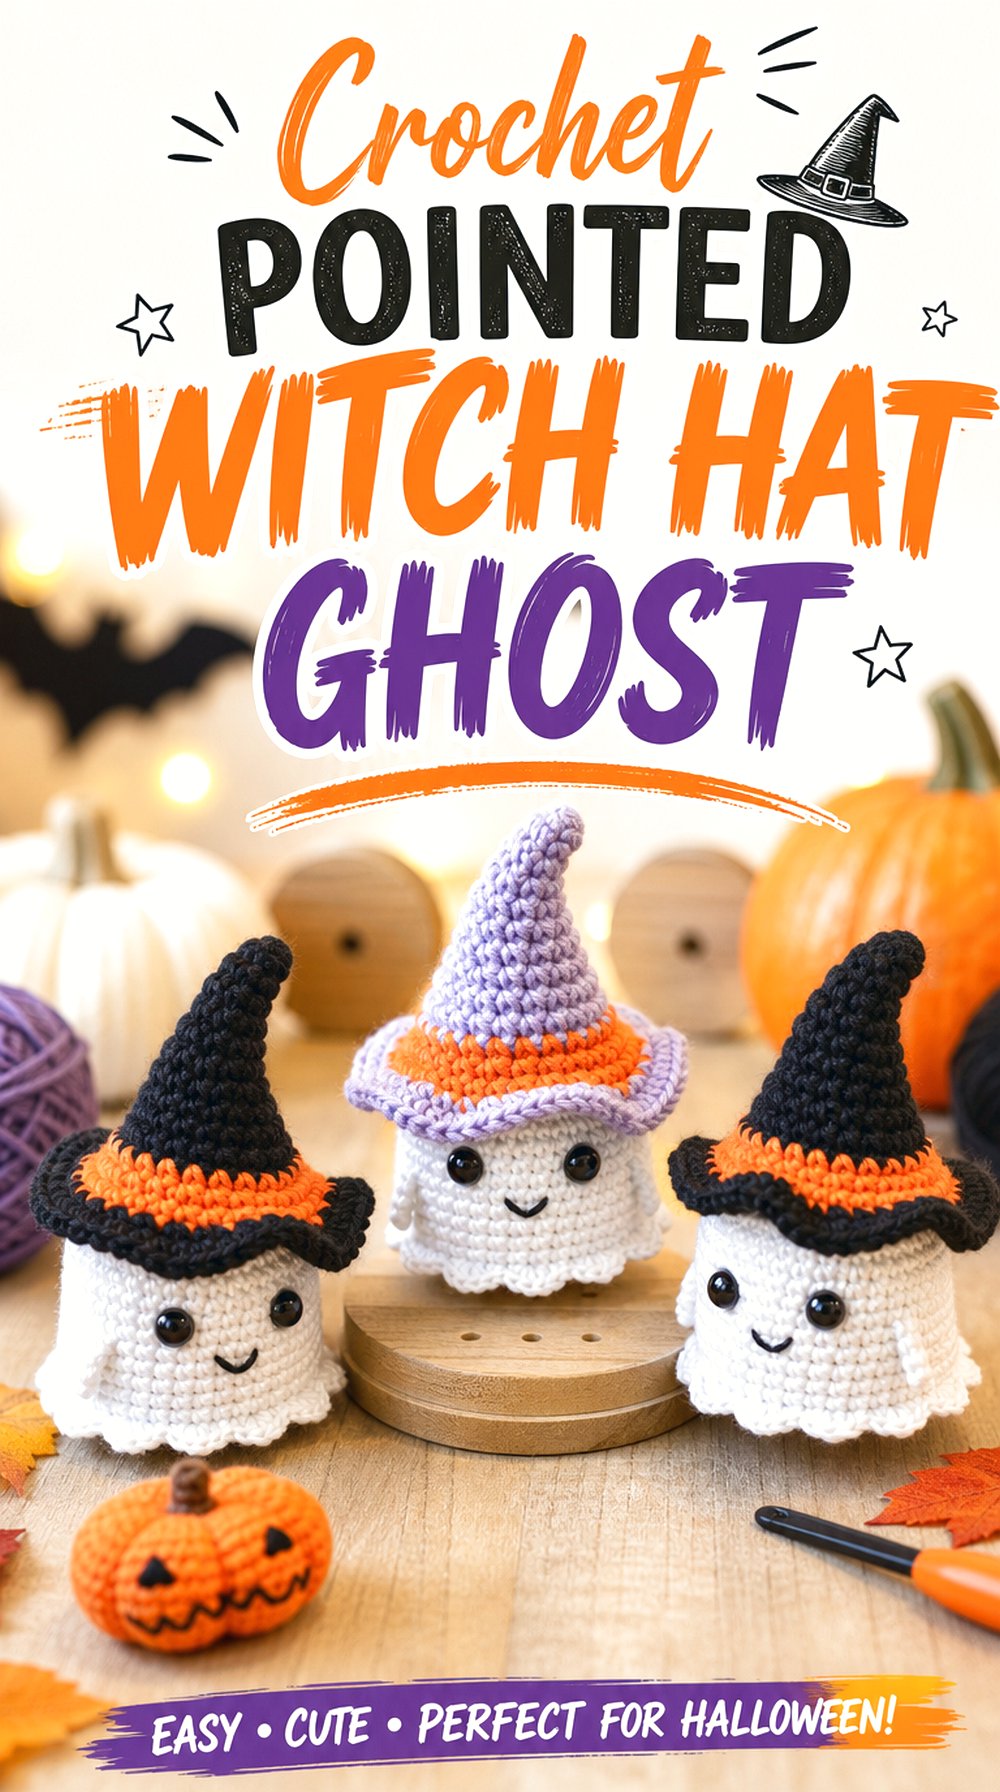
A pointed witch hat gives this ghost a clear Halloween costume look while keeping the body simpler than the shawl version. The finished piece has enough seasonal detail for a shelf or small gift, but the focus remains on the ghost shape and hat silhouette. This is a useful middle option for readers who want more than a plain ghost without choosing a project that includes several large accessories.
Check the Hat Angle
The hat is the detail that gives this project its personality, so its angle and placement matter. A hat that sits too low may cover the face, while one that leans too far can make the ghost look unbalanced. Before securing it, compare the front view and side view so the finished character reads clearly.
Confirm Any Extra Components
The creator lists supplies such as stuffing, safety eyes, glue, and small tools in the source information. Readers should review that list before starting, especially if they usually avoid glued details or prefer sewn finishing. Knowing which extras are involved helps prevent stopping halfway through the project to find missing materials.
Slow Down the Finishing Stage
The body and hat need to look like one finished character, not two separate pieces placed together. Use the final part of the original tutorial carefully, especially where the face and hat are completed. Good finishing will keep the witch-hat detail visible while still letting the ghost body remain the main shape.
Original Tutorial and Creator Credit
Creator: Yui Crochet
9 . Crochet Button-Front Ghost with Arms
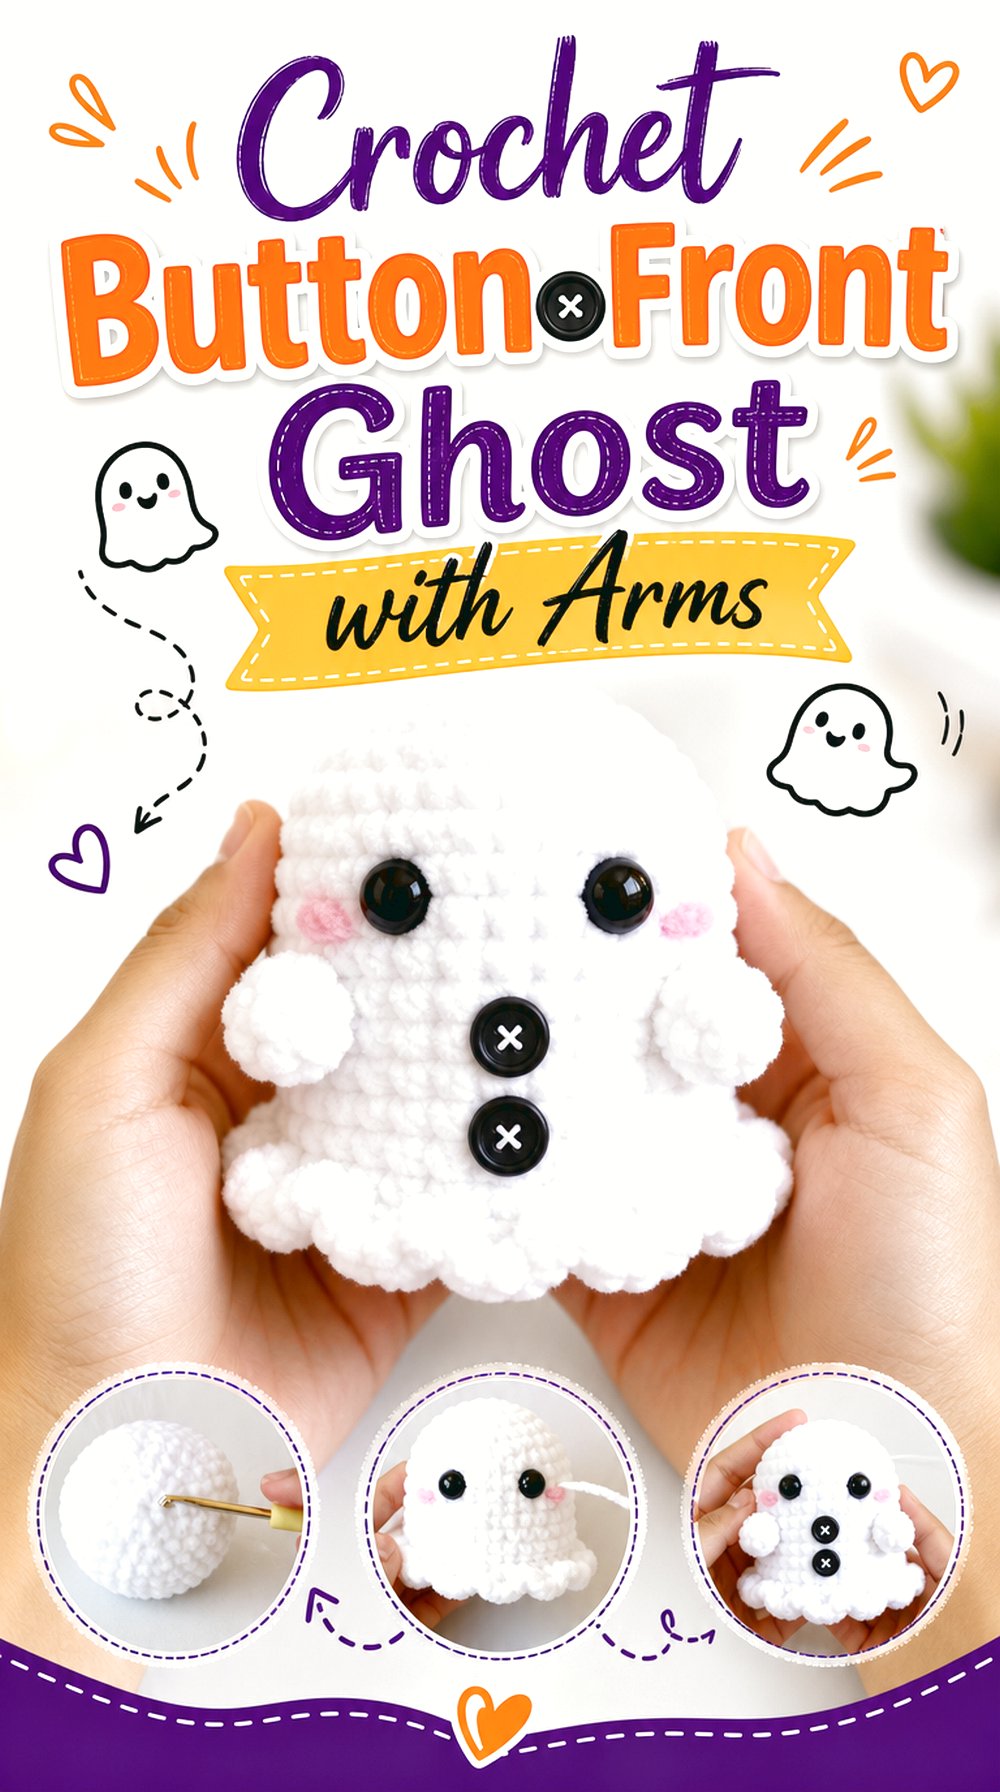
This ghost includes arms and button details, giving it a more dressed, character-style look than the plain rounded versions. The buttons add a front-facing feature, so the finished item works best where viewers can see the body clearly. It differs from the hat ghosts because the interest is on the body details and arm placement rather than a large accessory sitting on top.
Keep the Front Details Visible
The buttons are part of what separates this ghost from simpler shapes, so plan the display angle around the front. If the ghost sits in a group, avoid placing pumpkins, signs, or other amigurumi pieces directly in front of the body. The face, arms, and buttons should all be easy to see at the same time.
Inspect the Arm Placement
Arms can change the expression of a ghost amigurumi. Look at how high they sit and how far they extend from the body before attaching or finishing them. Even small differences can make the ghost look excited, relaxed, or uneven. Follow the creator’s placement guidance rather than guessing from the finished photo.
Use the Subtitle Information Carefully
The source notes Spanish audio with English subtitles, so viewers who rely on English instructions should turn subtitles on and review the guide before starting. This is especially useful around the arms and button details. Pausing at each main shape change can help readers keep the body and front features aligned.
Original Tutorial and Creator Credit
Creator: Addha Amigurumis
10 . Crochet Colorful Halloween Ghost Amigurumi
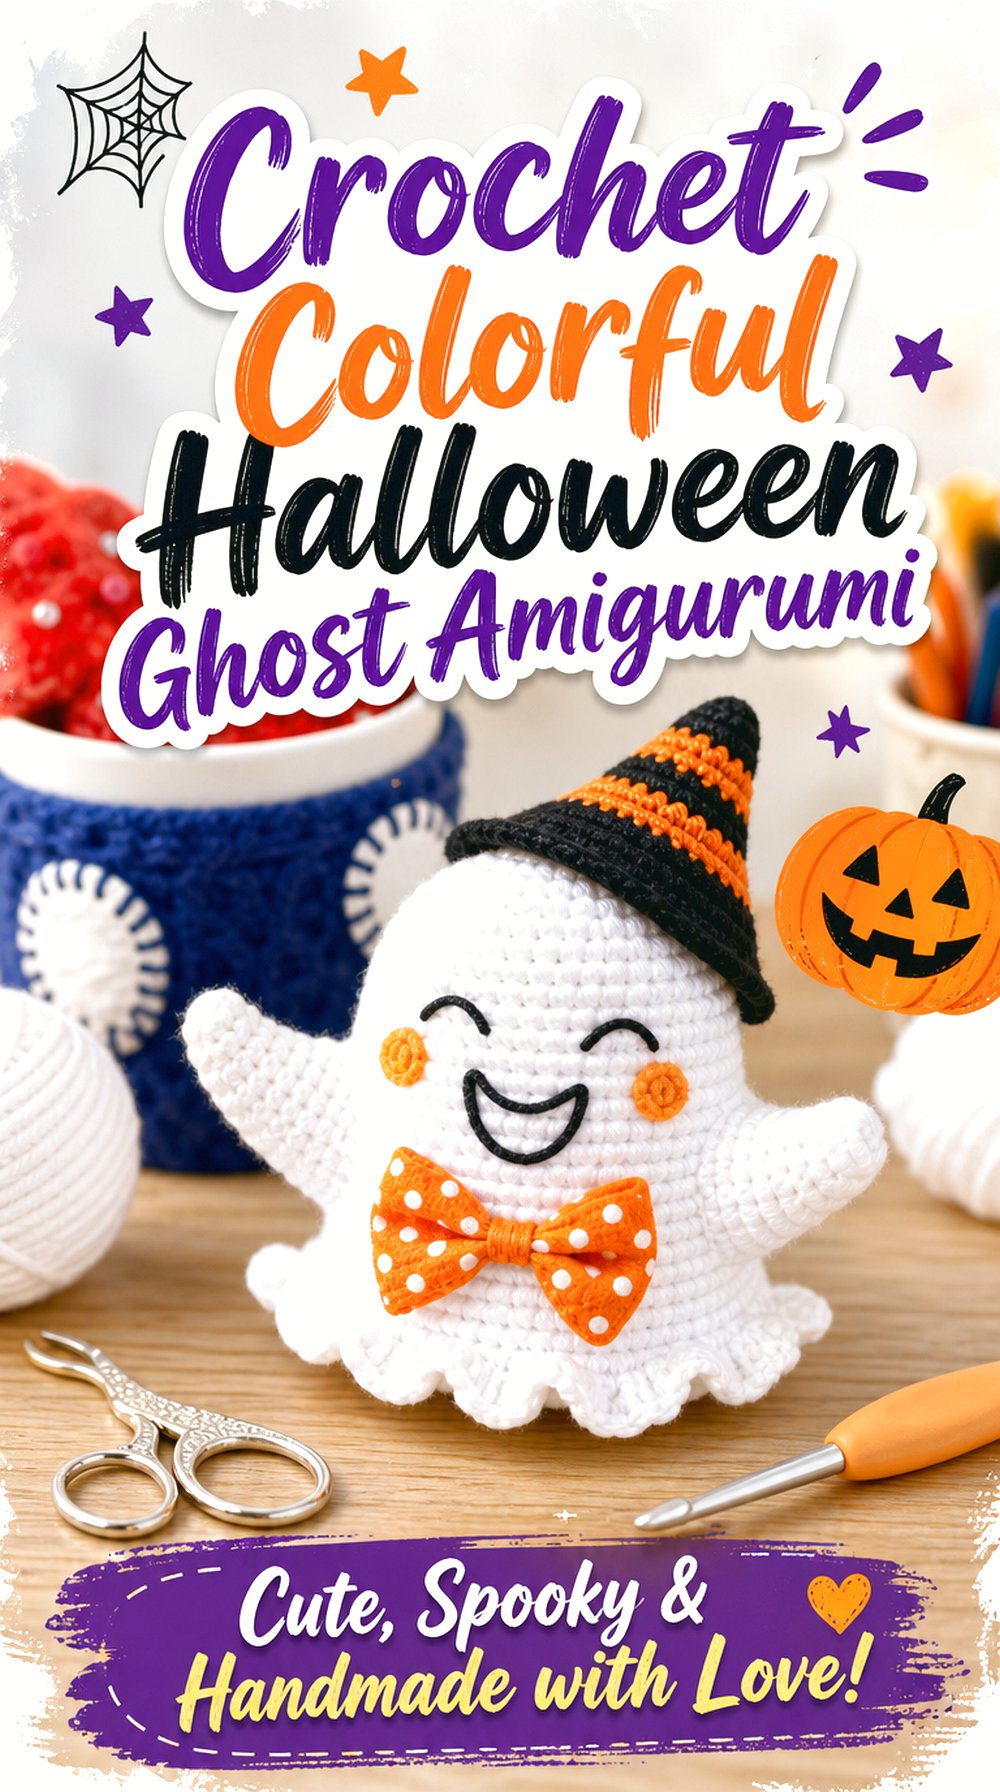
This colorful ghost idea moves away from the usual all-white look by using Halloween color options such as orange or purple accents. The finished figure still reads as a ghost, but the stronger color direction can help it match party decor, a bright Halloween shelf, or a playful gift set. It is different from the other projects because color is not just a tiny face detail; it becomes part of the overall character.
Choose the Color Direction
The creator’s description mentions orange or purple as possible choices, which gives readers room to match their Halloween palette. Orange can sit well beside pumpkins, while purple may suit a darker spooky display. Choose the color direction before starting so the ghost looks intentional rather than made from leftover yarn without a plan.
Balance Color and Face Detail
A colorful ghost still needs a clear face to stay recognizable. If using a stronger body color or bright accent, make sure the eyes and mouth remain visible from the distance where the ghost will be displayed. Good contrast is especially important if the finished piece will sit among other Halloween amigurumi or decorations.
Check the Skill Notes
The creator lists several techniques needed for the project, including crochet, shaping, color changes, embroidery, and sewing-related skills. Readers should review those notes before beginning, especially if they usually prefer very simple no-sew amigurumi. This project may be a better fit for someone comfortable following a fuller Halloween character tutorial.
Original Tutorial and Creator Credit
Creator: KnittingKitty
Conclusion
These crochet ghost amigurumi ideas give readers several ways to make Halloween ghosts without repeating the same project ten times. For small accessories, the keychain and hanging charm are the most practical picks. For shelf decor, the standing sheet ghost, rounded plush, colorful ghost, and mini hat ghost offer clear display options. The witch-hat, pumpkin-shawl, button-front, and arm-detailed ghosts add more character for readers who want extra finishing. Use the original tutorials for the exact construction details, materials, and assembly steps before starting.
FAQs
How do I choose the right crochet ghost amigurumi size?
Start with where the ghost will be used. A keychain or hanging charm needs to stay compact and balanced, while a shelf ghost can be larger and softer. Check the creator’s finished size information when it is provided, and remember that changing yarn weight or hook size can change the final result.
Are safety eyes always the best choice for crochet ghost amigurumi?
Not always. Safety eyes can give a neat finish, but embroidered eyes may be preferred for certain gifts or display needs. Check what the original creator uses and whether the tutorial offers alternatives. Never assume a finished toy is suitable for a child unless the creator clearly provides age-safety guidance.
Can I change the colors on these ghost amigurumi projects?
Yes, color changes can work well for Halloween ghosts, especially with orange, purple, black, cream, or glow-style yarns. The important point is contrast. The face, hat, buttons, or pumpkin details should stay visible. If the creator gives color notes, use those as the first guide before substituting.
What should I check before making a hanging ghost charm?
Look at the attachment point, cord length, hardware, and how the ghost hangs once finished. A charm may twist or lean if the pieces are not balanced. Review the final assembly section of the original tutorial before fastening anything permanently, especially when the design includes both a ghost and a pumpkin.
Can I sell finished ghosts made from YouTube tutorials?
Do not assume selling is allowed. Check each creator’s written terms, video description, linked pattern page, and any license notes before selling finished items. Some creators allow finished-item sales with credit, while others limit use. Credit is respectful, but it does not replace permission when terms are restricted.